If, like me, you’ve been both building silly things for little or no reason, and also using the Internet, chances are you’ve come across one of Grant Thompson’s videos. The self-styled “King of Random” runs the gamut on fun DIY projects, and if it can be made from cheap hardware store supplies, chances are he did it. His work provided a lot of inspiration to me, and my kids regularly play with toys and gadgets that started with one of his videos.
Four or five years ago, I can across this video of Grant’s, in which he details building reliable check valves out of 3/4″ PVC fittings. Like many of his videos, it intrigued me, and so, having no particular need of a check valve of any sort, I immediately started to replicate his work.
But, as so often happens, I immediately ran into problems. See, Grant didn’t leave much of a materials list in that video. I know I need two 3/4″ threaded male slip adapters, a 3/4″ acrylic ball, and an o-ring. I dug way down deep into the video’s comments section, and he did leave a few links to materials (several years after the video was posted), but the list is incomplete, as I’ll detail in a moment. Most unfortunately of all, he’s no longer available to ask.
Thus began an unending journey to build the perfect PVC check valve, and ensuing slow descent in to madness.
Of Balls and Bearings
The ball bearing is simple enough, though the listing Grant linked has horrible reviews and aren’t the ones featured in the video (the one in the video is clear, the ones he linked are frosted). I opted for these steel ones instead, which work pretty well, though they’re heavier and that gives them a bit of a minimum working load when used vertically. McMaster-Carr carries 3/4″ balls in both acrylic and ceramic. I’ve used the acrylic ones in a couple of these and they work very well, especially for wet applications.
Male PVC slip adapters are not what they appear
Arguably the most important part of the build is the male PVC slip adapter. At the start, I just headed to my favorite blue bucket store and bought a double handful of them. Surely the plumbing industry has long since standardized these things, and they’re all the same, right?
Wrong. Very, very wrong.
Pausing Grant’s video at the 0:33 mark, I can see he’s using a Genova fitting, specifically part number 30407. My local hardware stores don’t carry Genova, and instead have an assortment of fittings from Lasco and Charlotte Pipe. How different are they?

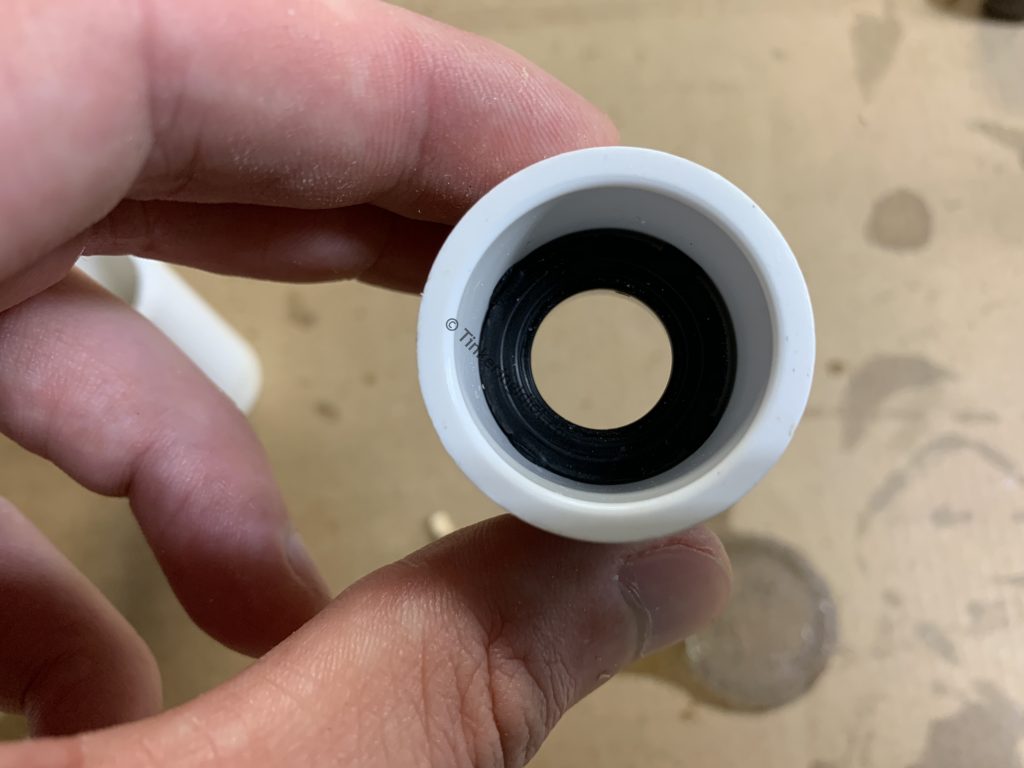
From left to right above, I’ve got a Genova, a Lasco, and a Charlotte Pipe. Clearly, the inner diameter of the threaded end is not standardized. It makes sense that Grant’s build goes so smoothly, as the ball seats nicely in the Genova, so the o-ring only has to seal up the air flow around it. Using the Lasco or Charlotte Pipe fittings, the o-ring also has to retain the ball, and in the case of the Charlotte Pipe fitting, it needs to do so securely because otherwise that ball comes shooting out the other end at roughly the speed of dented-garage-door (no comment).
Pain in the O-ring
Grant’s comment links to a package of 016 buna-N o-rings. For his build, using the Genova fittings, they work reasonably well. The o-ring has an outer diameter (OD) of 3/4″. 3/4″ PVC has an inner diameter (ID) of…well, 3/4″. The 016 o-ring will fit inside the pipe, but that’s OK because the male end of the Genova fitting has an ID slightly less than 3/4″, so everything stays where it’s supposed to be, mostly. I built several using Grant’s design, and two of them saw the o-ring come unseated and work its way around the ball, rendering the valve worthless. I was really abusing them when that happened, so he’s not wrong, I’m just not careful with my toys.
However, the 016 o-ring doesn’t work at all with the Lasco or Charlotte Pipe fittings. Especially the Charlotte Pipe – the male end on those also has an ID of 3/4″, so the o-ring and ball tend to escape…violently.
So, I went shopping for another o-ring. Ideally, I wanted a slightly larger OD with the same 5/8″ ID, so I could pinch the o-ring between the pipe and the fitting to hold it in place, and it would still retain the ball.
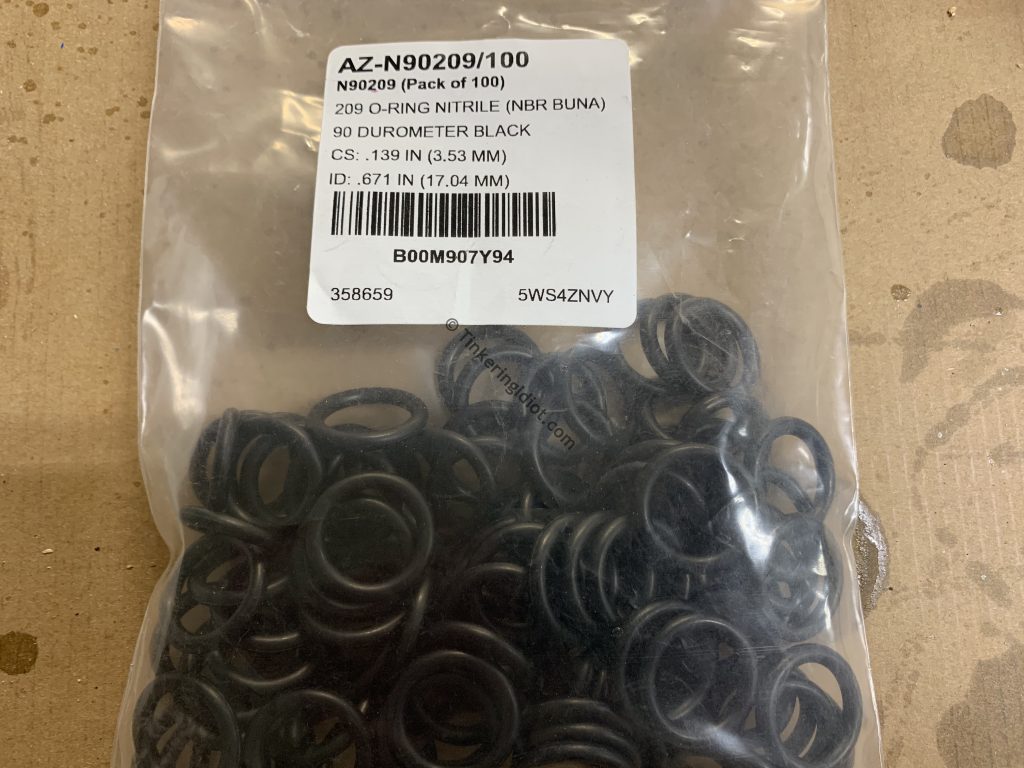
After way to much time spent shopping for o-rings, I settled on the 209 buna-N o-ring. An 11/16″ ID should still retain the ball, and a 15/16″ OD should provide more than enough material to pinch between the pipe and the fitting.
Seating Troubles
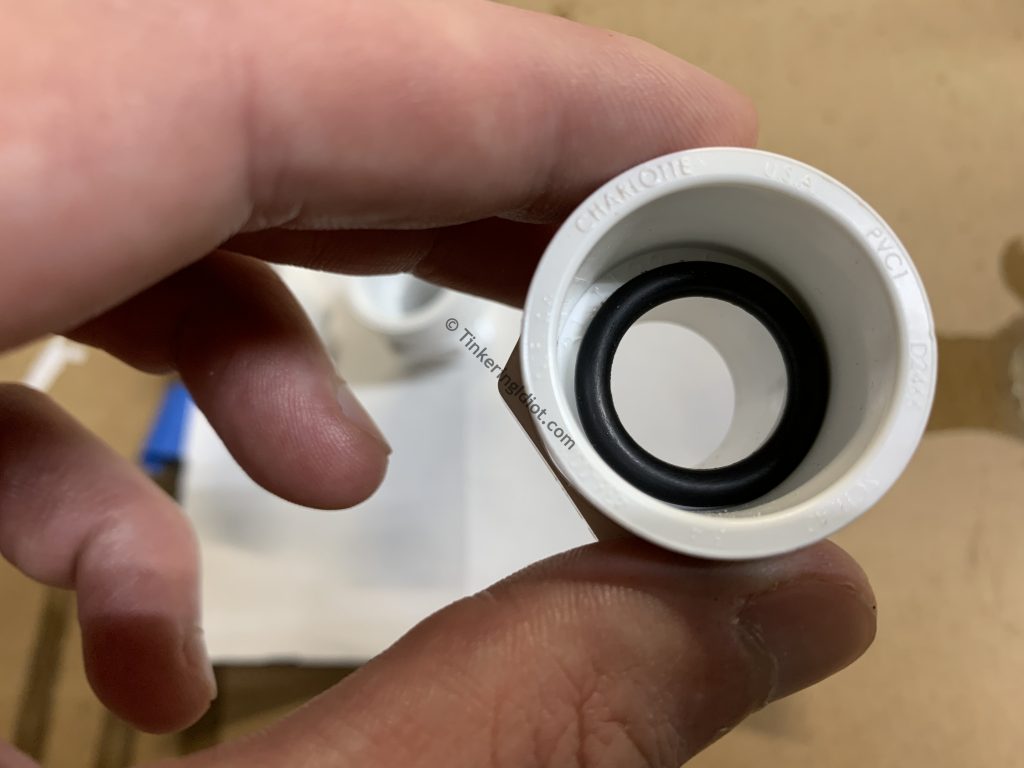
The 209 o-ring works well, but it makes for a very tricky build, because it does not fit precisely in the slip end of the male adapter.
This makes getting the pinch right very fiddly, and since this is happening along side PVC cement, there’s a high potential that each attempt winds up in the art bin.
I did have some moderate success with a sanded 3/4″ dowel rod. Using the Charlotte Pipe fittings, I could seat the o-ring on the end of the dowel, slide the dowel through the fitting, then slide the pipe over the dowel and into the fitting. This should hold the o-ring in place while the cement cures. And it does…most of the time. But I wanted something more reliable.
Next, I tried cutting an interior bevel in the end of the pipe. My theory was that the bevel would force the o-ring into place, and it would always end up centered. I used a step-bit to achieve this.
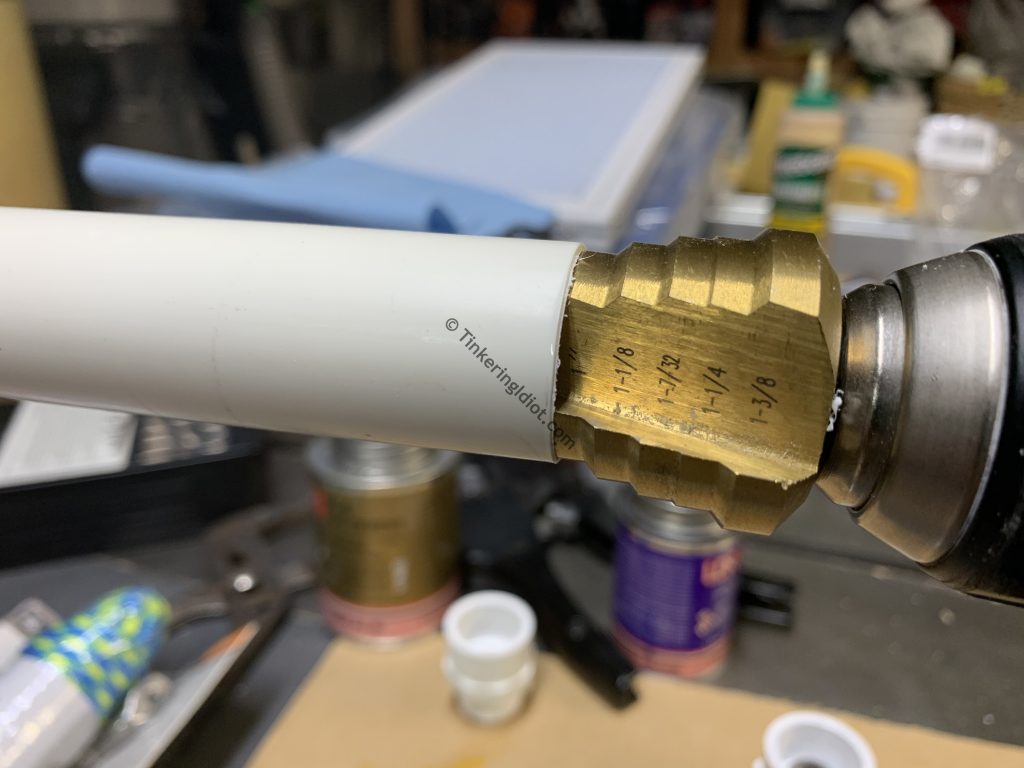
Cutting to just shy of the 1″ step, I was able to achieve a nice interior bevel. The wall thickness, and thus pressure tolerance, is shot, but it’ll have the fitting wrapped around for extra support.
I forgot one important thing, though. The pipe is supposed to pinch down on the o-ring to create a good seal. The pipe’s wall material achieves this. Material that I just cut out. Sigh. As 5 seconds of forethought should have revealed, the bevel creates a nice, wide leak path and the valve is useless.
Saved by simplicity
As I said, the 209 o-ring works, even though it’s challenging to work with, and I built a number of successful valves using it. But (eventually) I started to want a wider o-ring – something I could easily and reliably seat and pinch in place, but with a small enough ID to retain the ball in any brand of fitting. Something with an ID of 5/8″, but an OD of 1″ to match the fitting.
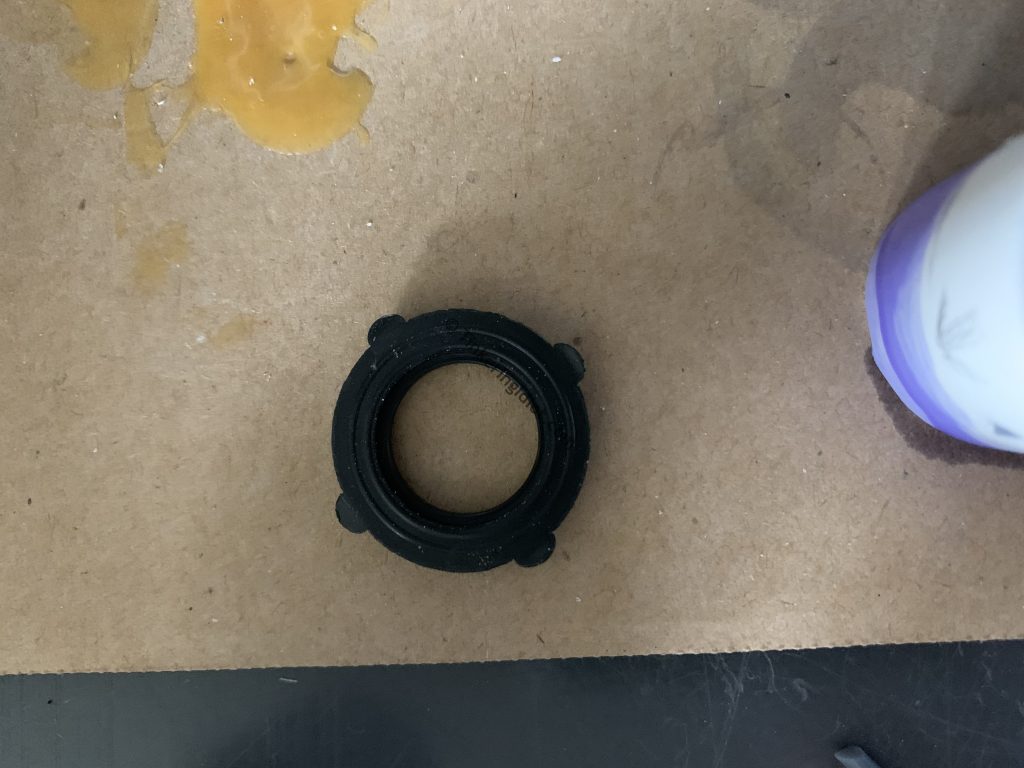
It turns out there’s such a thing as a rubber washer. Also, once you know the name of a thing, it’s much easier to scour the Internet for. As it so happens, one of these washers exists with exactly the dimensions I was looking for: the noble garden hose washer. Even better, I had a pack of these in the garage the entire time.
Shut up and build
So, after literally years of tinkering with this simple little project, I’ve finally got a method that works.
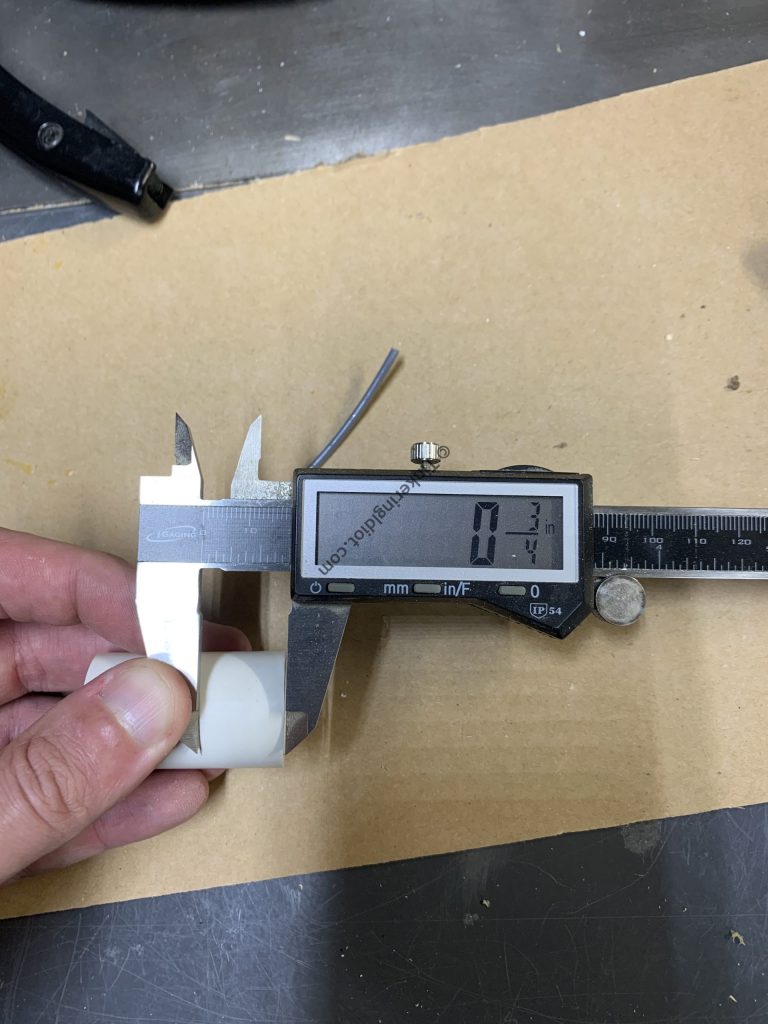
I start with a 1 1/2″ section of 3/4″ Schedule 40 PVC. This can be longer, but 1 1/2″ will have the two fittings butted right up against each other. It’s important to have the ends of the pipe cut as squarely as possible, as this will put even pressure on the washer and create a better seal. I use a table saw and cross cut sled to achieve square cuts – a PVC cutter never seems to give me a very good cut.
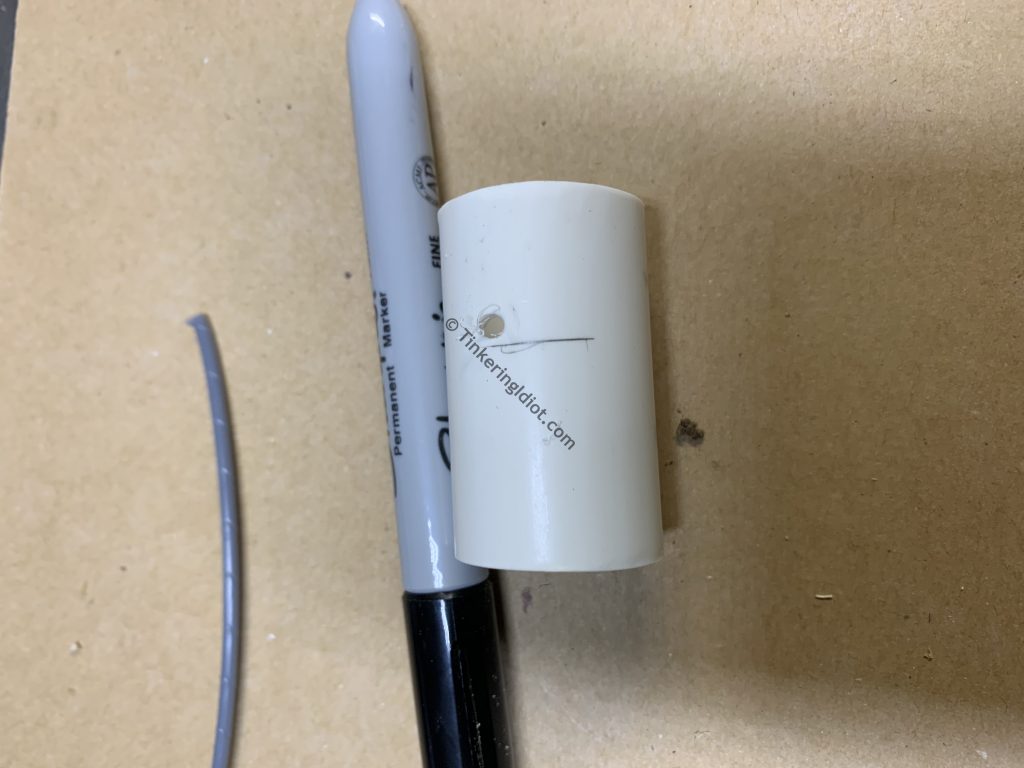
I mark off 3/4″ from one end of the pipe, and choose a side for the valve end.
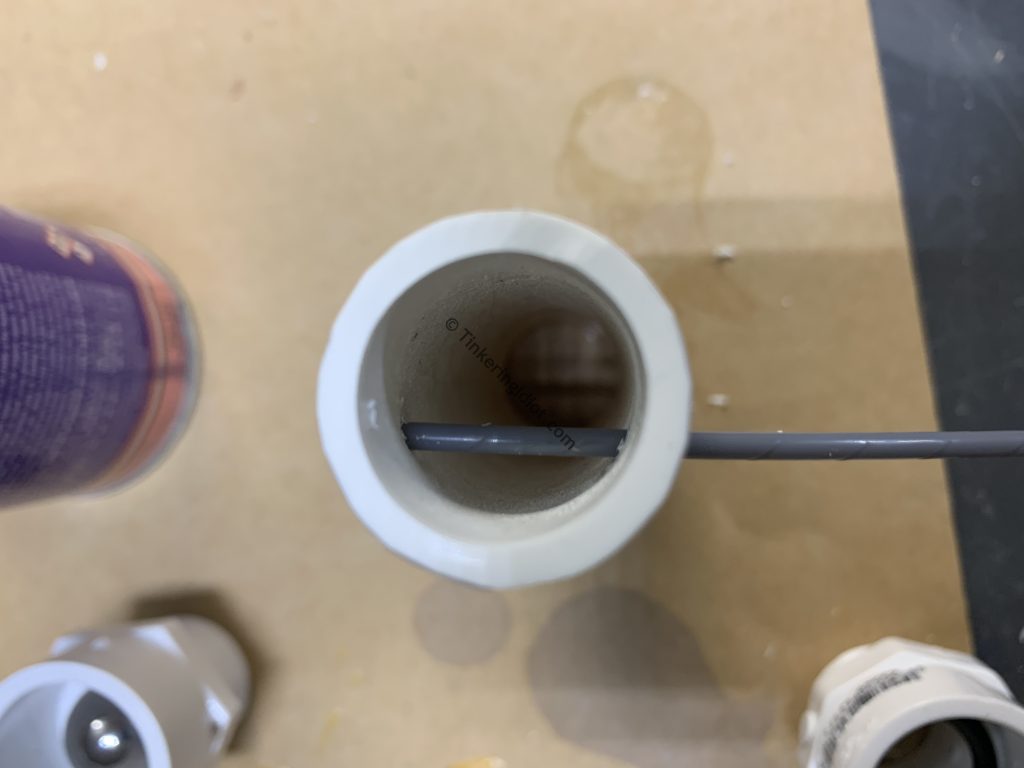
Just barely on the valve end side, I drill a hole large enough to slide a bit of weed-whacker line through. This will be the retaining bar that keeps the ball close to the washer, so the valve will close up easily. I drill these off-center a bit, to give the ball a little extra room to open up more fully, but a centered hole works too.
I slide in a bit of the weed-whacker line, and trim it flush with a knife. The fitting will slide over this hole and keep the line in place.
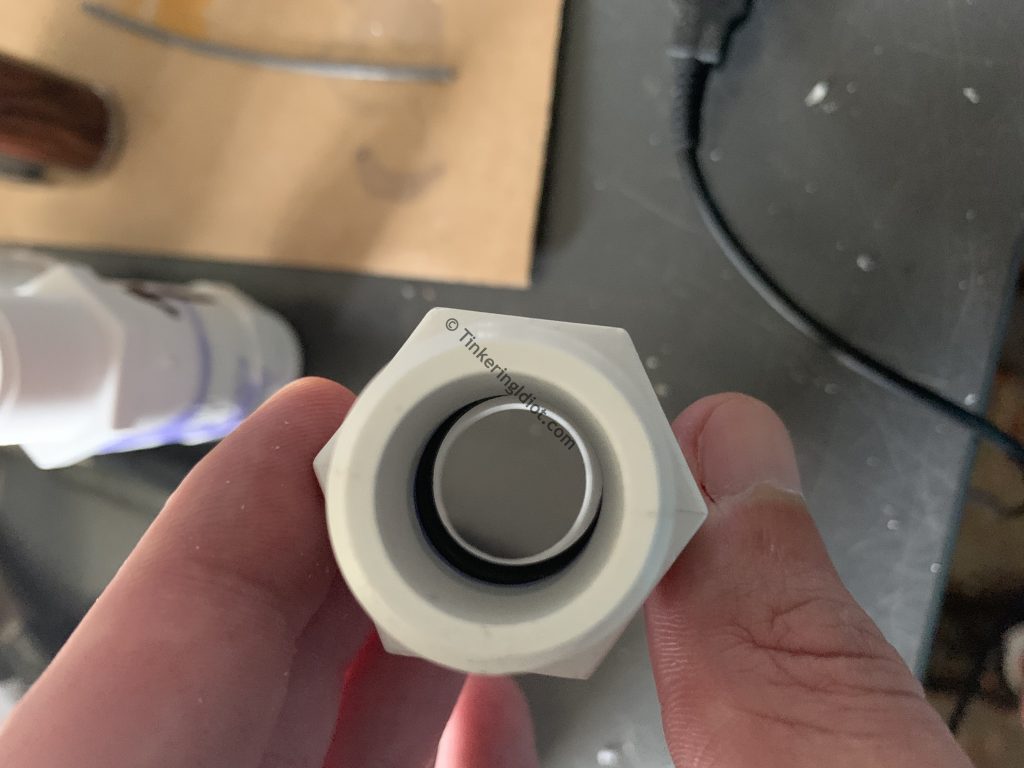
The rubber washer has a smooth side, and a ridged side.
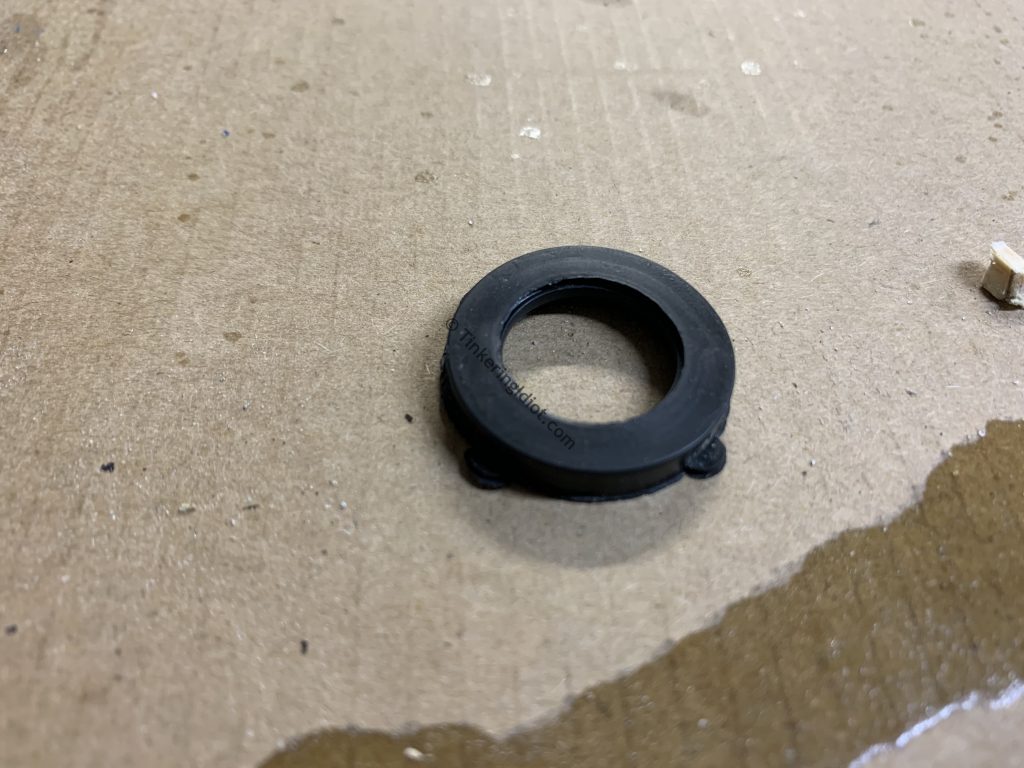
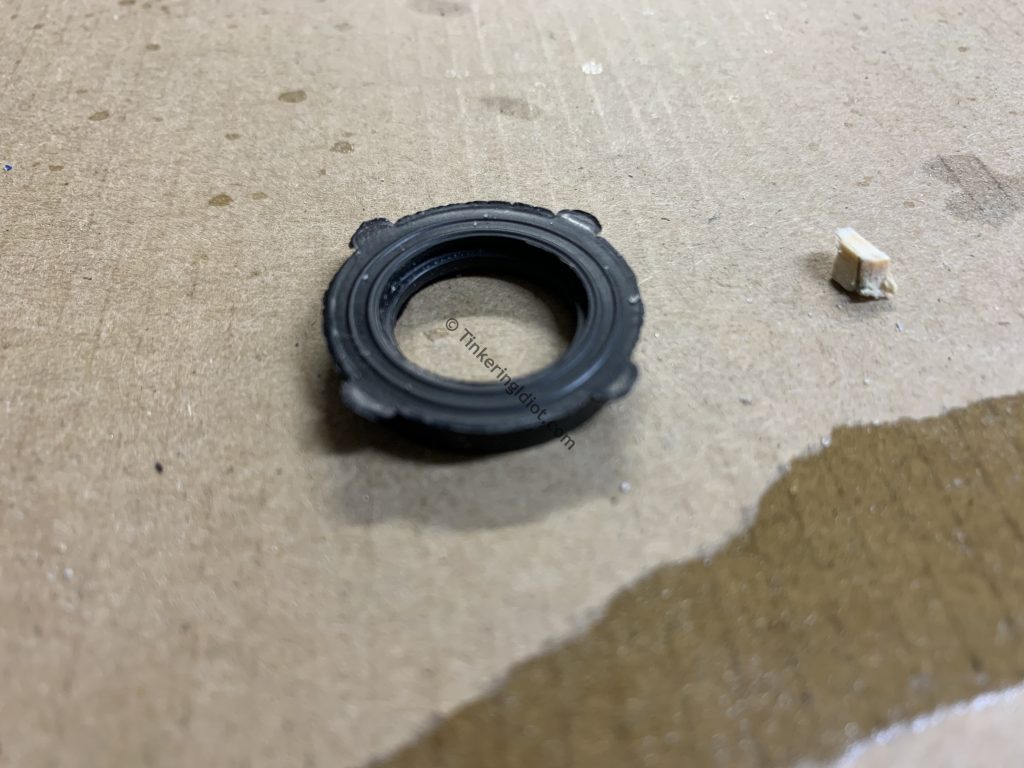
I put the washer into the threaded male PVC slip fitting, smooth side toward the threads. I find that this gives a better seal once it’s all assembled. Also, cutting off the 4 little tabs on the washer substantially improves the seal.
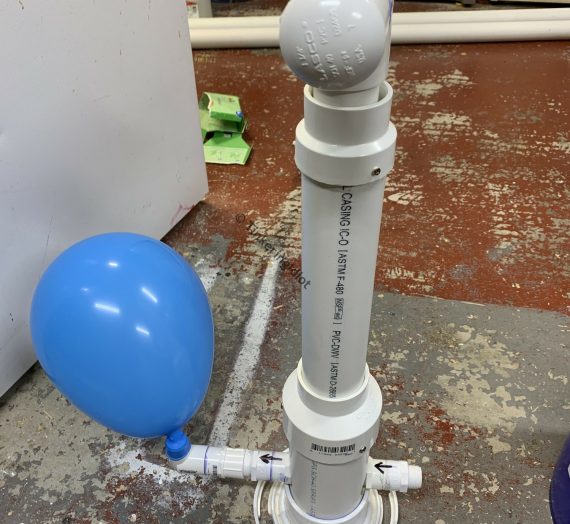
The ball goes in top of the washer, then I glue the pipe in to the fitting. I put them together as tightly as I can until the glue cures, to ensure a good seal.
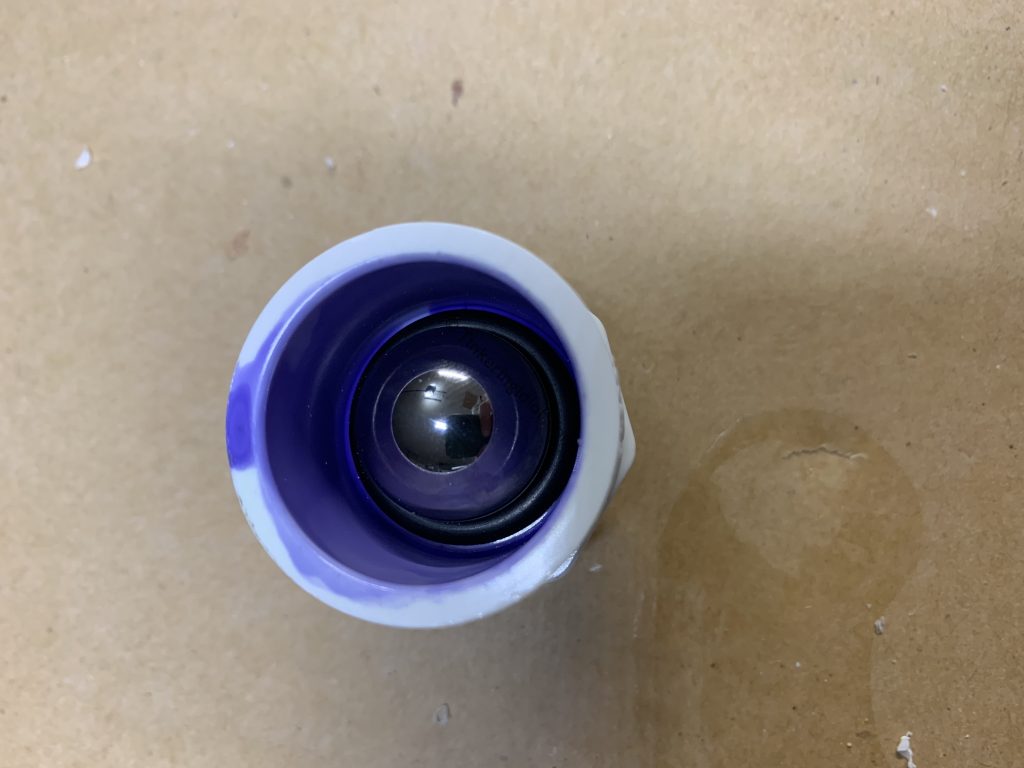
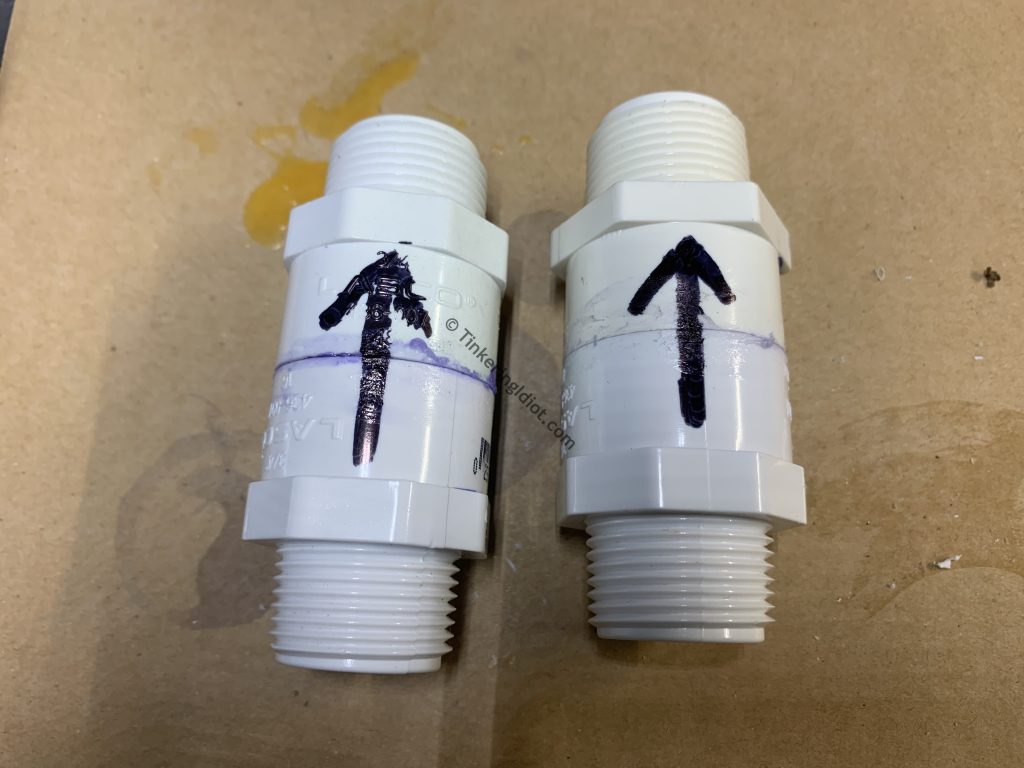
On the other end of the pipe, I simply glue on another male fitting. This could be anything, but I like the threads for portability. I usually draw an arrow on them to indicate the flow direction. And that’s it! Easy, inexpensive 3/4″ PVC check valves.
I haven’t tested them exhaustively at super high pressures, but they hold up at reasonably low vacuum pressures, and normal use in my various pumps.
I wish Grant were still around. I’d love to be able to share this with him.