
I don’t really fancy myself a woodworker. I mean, I make things, and I use wood in that process pretty regularly. I’ve even made furniture on more than one occasion. I love the tools and the process of turning wood in to neat stuff, but I haven’t yet developed the discerning eye nor careful hand that I associate with true woodworkers, the craftsmen/women that blow minds with their amazing creations. There are folks out there producing show-quality pieces in their garages, the sorts of things you’d expect to find in a Senator’s office, or a Fortune 500 board room. What I do is, by comparison, just tinkering with dead trees.
I do, however, have a nice set of basic chisels, and I don’t want to destroy them over time by using a claw hammer. So I may not be a woodworker (yet), but I need a woodworker’s tool: the noble wooden mallet.
I’m starting this project with a rarity, for me: hardwood. My only source for wood is the big-box hardware stores, and while I love them, their selection of hardwoods is lacking. However, I was able to get some reasonably straight red oak 1×4 for another project recently, and this is what I did with some of the scraps.
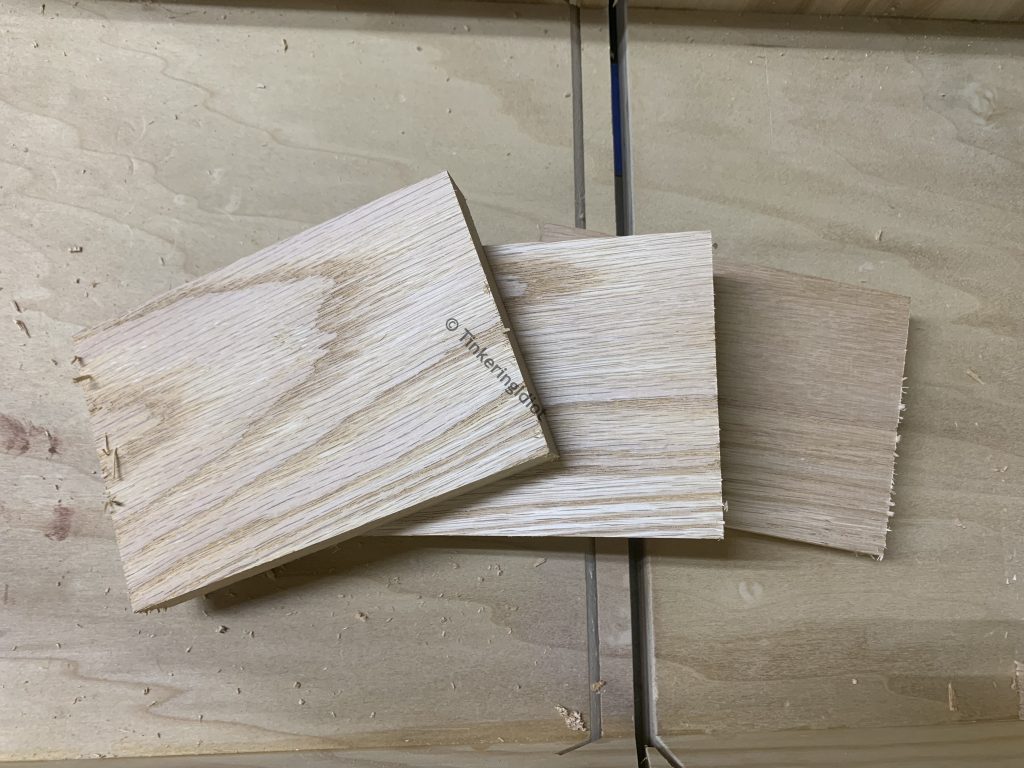
It all begins with 3 5 1/2″ lengths of oak 1×4.
I laminate these together with glue to make the head.
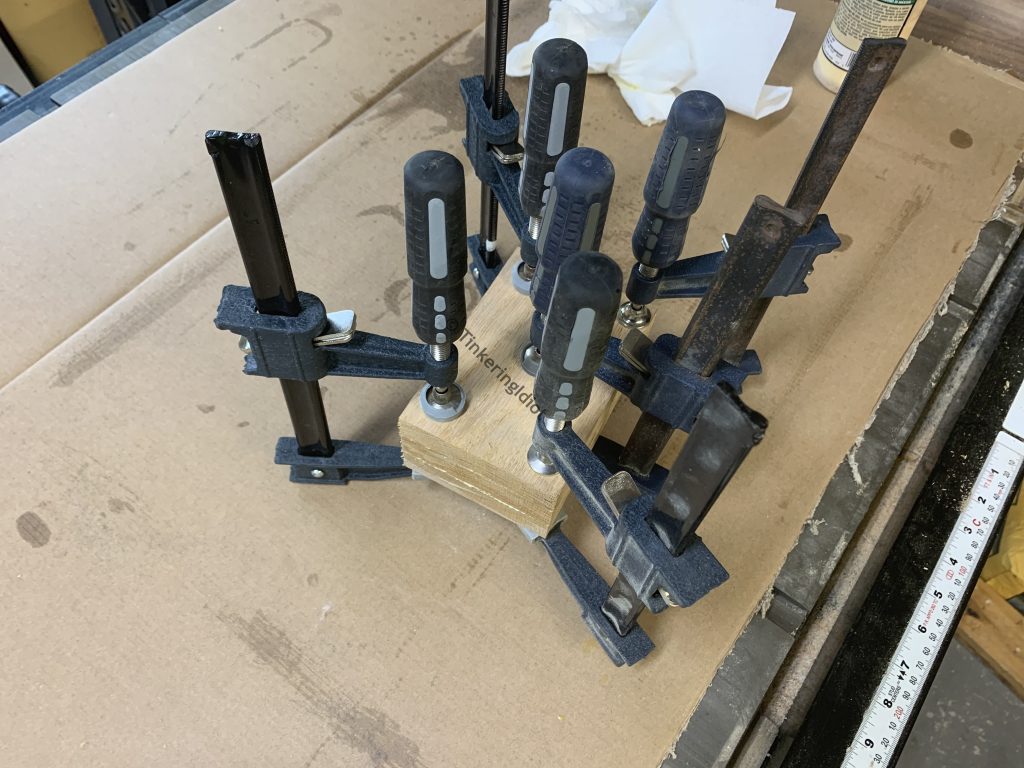
Next, because A) I got a lot of squeeze-out that I don’t want to sand off and B) I didn’t get everything lined up perfectly, I run the edges through the table saw to get them nice and flush.
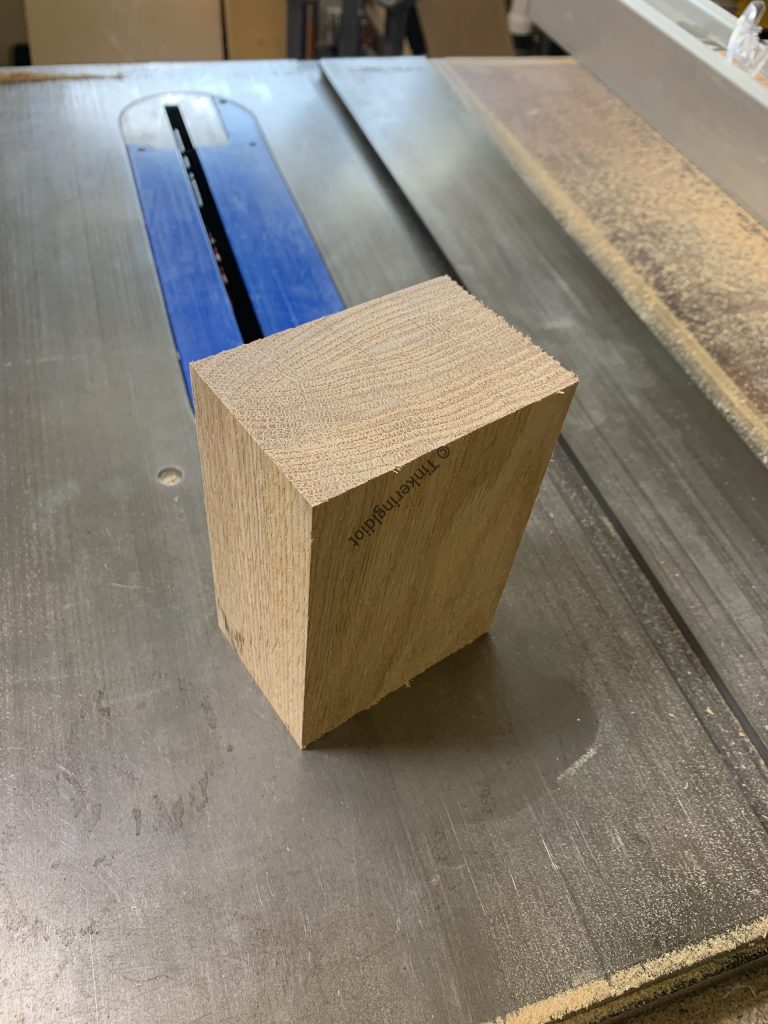
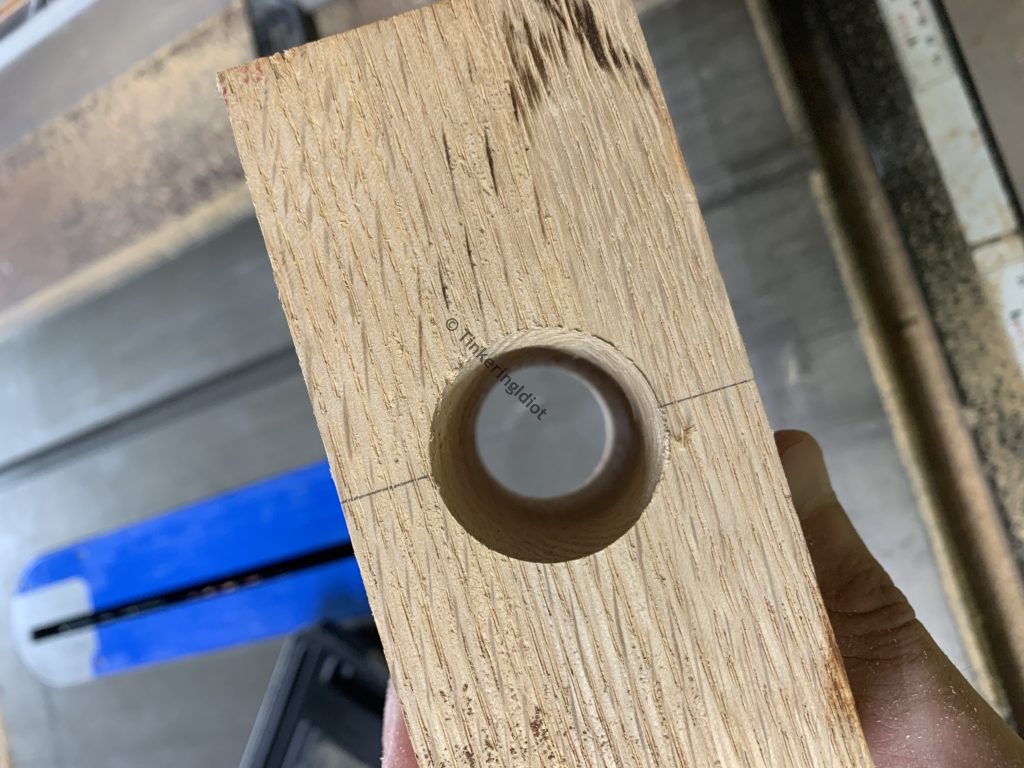
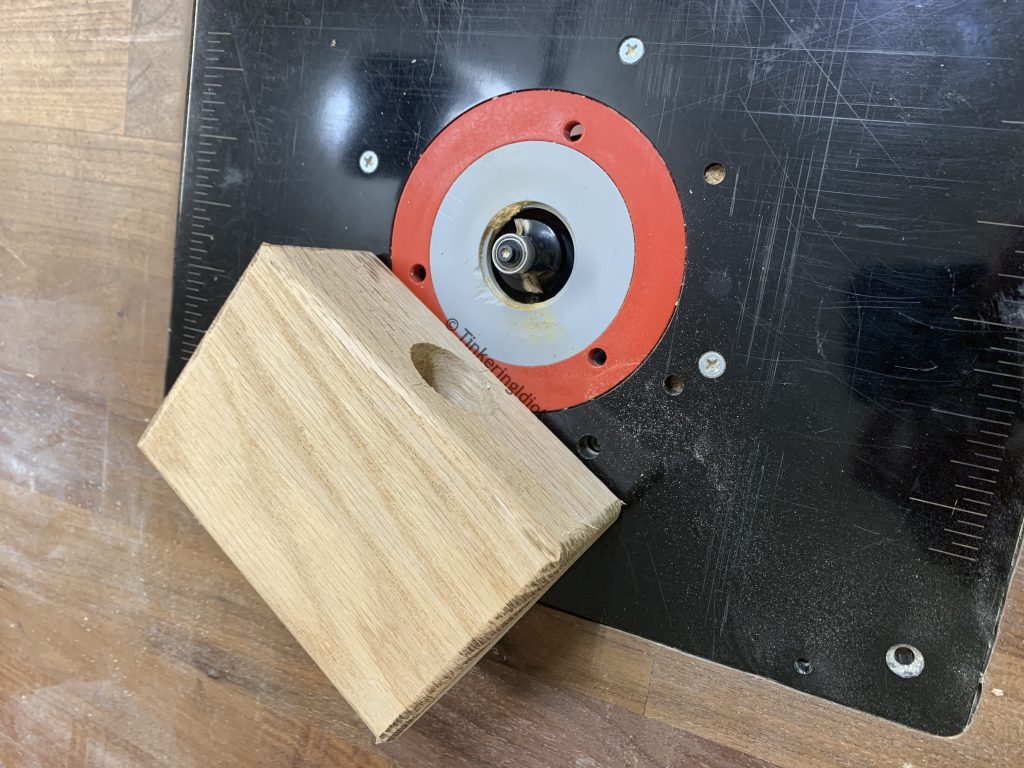
Wooden block to smack things with: check. Now it just needs a handle. I’ve got some 1″ red oak dowel rod laying around that will do the job. I mark out the center of the block.

Then I use a 1″ Forstner bit to bore a hole all the way through the block.
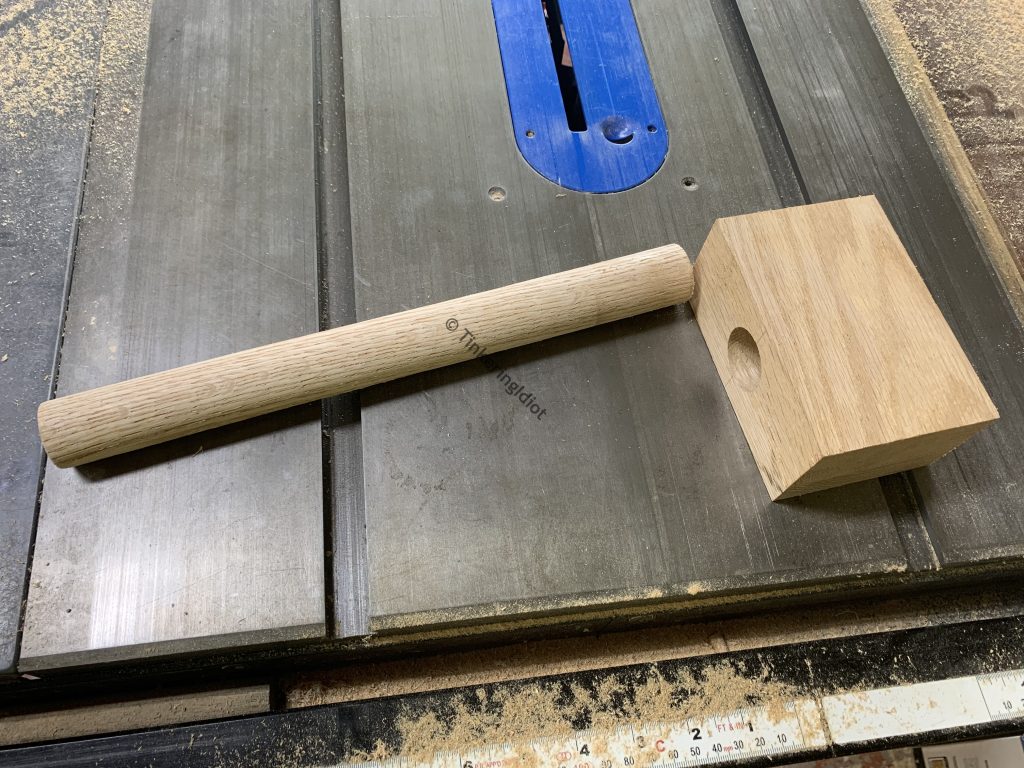
Paired with 12″ of 1″ red oak dowel, things are starting to look somewhat mallet-like.
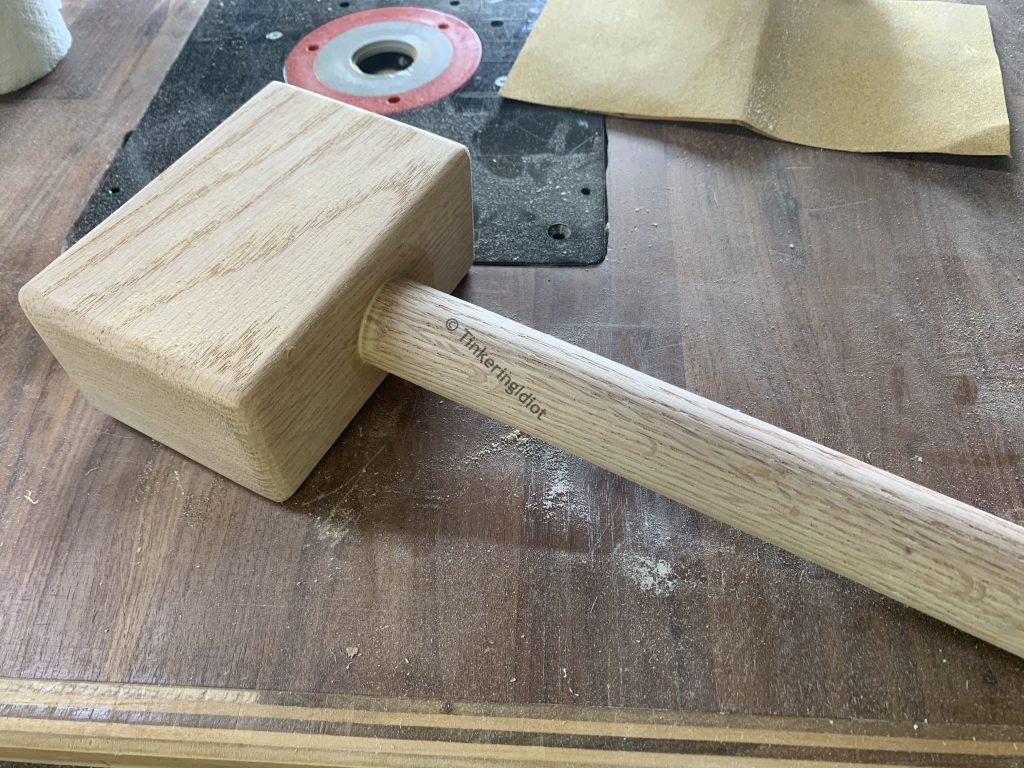
A 1/4″ round-over on the router table takes the sharp edges off the mallet head. This is more for my safety than for the look of it – chances are good this falls on some part of me more than once. But also, it looks good.
I decided to do myself a favor (for a change) and sand before attaching the handle. I might consider taking such drastic steps in the future, it really did make the finishing less painful.

Next, I glue the handle in to the head. It’s a snug fit, and the irony of needing a joinery mallet to build a joinery mallet is not lost on me.
It’s a mallet! I can gleefully begin wailing on things, at long last. However, this is where my engineering brain kicks in (because it’s not engineered until it’s over engineered). Thus far, the mallet is held together with glue – there’s no joinery reinforcing any of these joints, just lamination and a big hole. I don’t even have a wedge in the handle, mostly because I didn’t think to look up how to do that without making a huge mess of it.
Don’t get me wrong, wood glue is strong stuff. Strictly speaking, the wood should shatter before the glue does, and with end grain on the strike faces, this mallet ought to last longer than I do. But a mallet tap puts a lot of force on a small area, and my rudimentary understanding of physics tells me that I should try to distribute that load, ideally with some opposing wood grain. This is probably entirely unnecessary, but it makes me feel better about how strong this mallet is, and that makes it worth doing.
I decided to reinforce the mallet head with 1/4″ red oak dowel. This will give me the cross-grain reinforcement I want, and give a convenient way to make sure the handle remains a handle, and not an atlatl hurling the mallet head on a path of destruction through my shop.
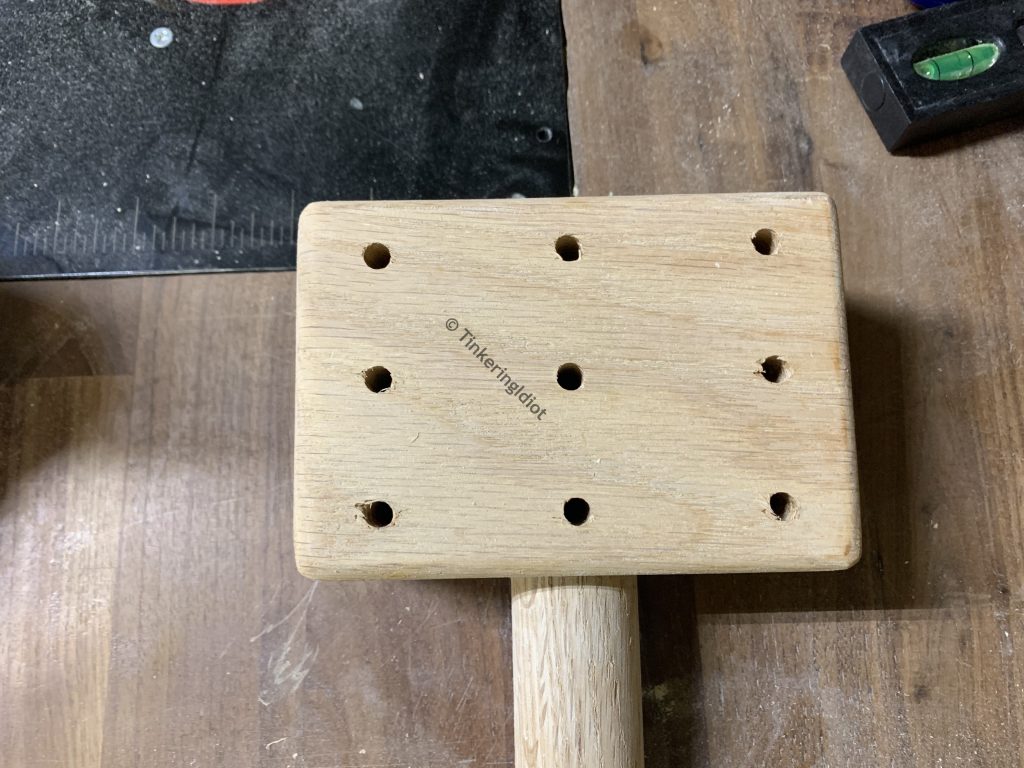
I begin by marking for 9 holes in the head, counter to the grain. 3 of these holes will go through the handle to help it remain firmly attached.
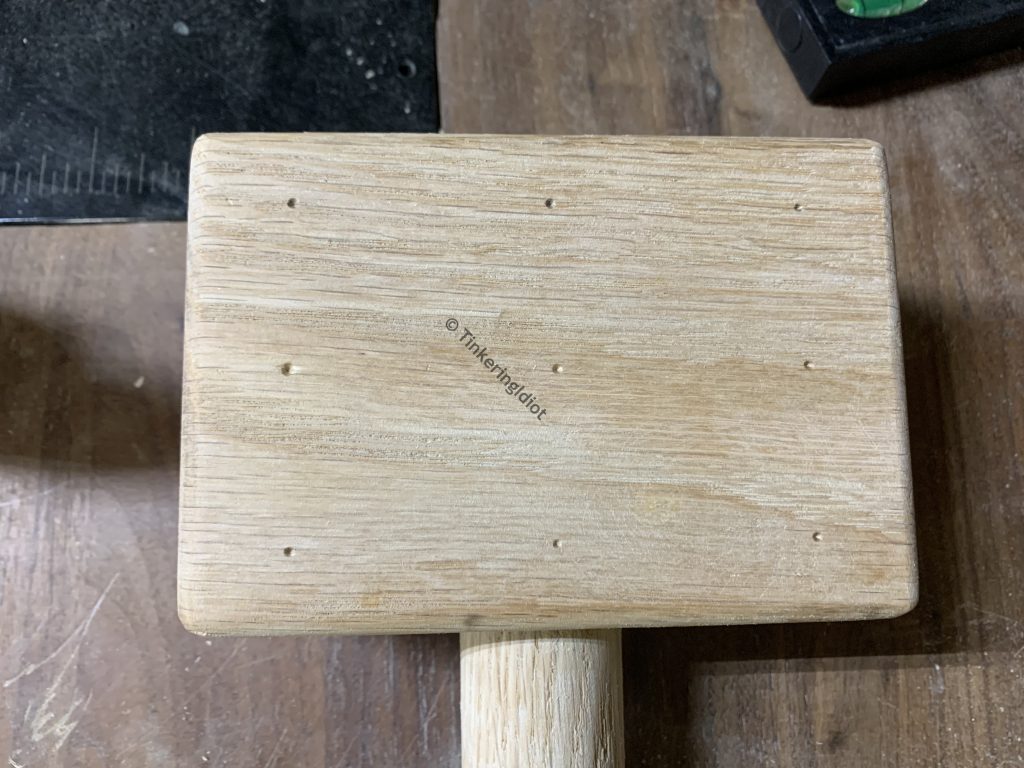
Marks become 1/4″ holes for the dowels.
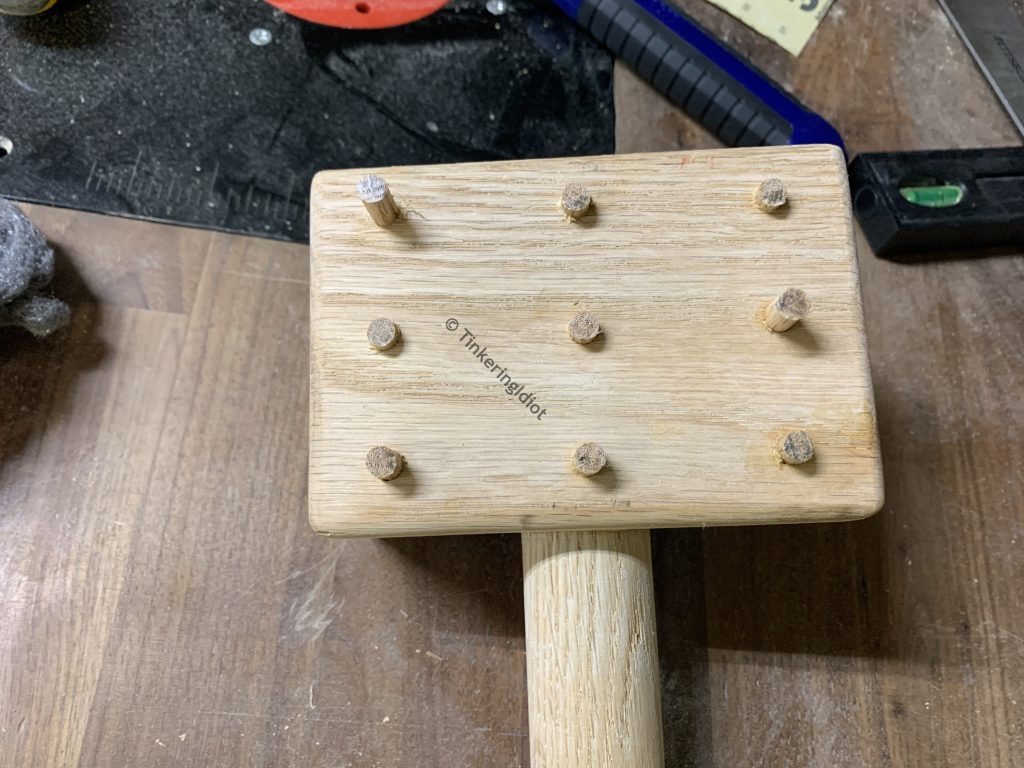
I fill the holes with glue and 1/4″ red oak dowels. I leave them long so I can cut them flush after the glue dries. Again the desire strikes for a joinery mallet to construct my joinery mallet.
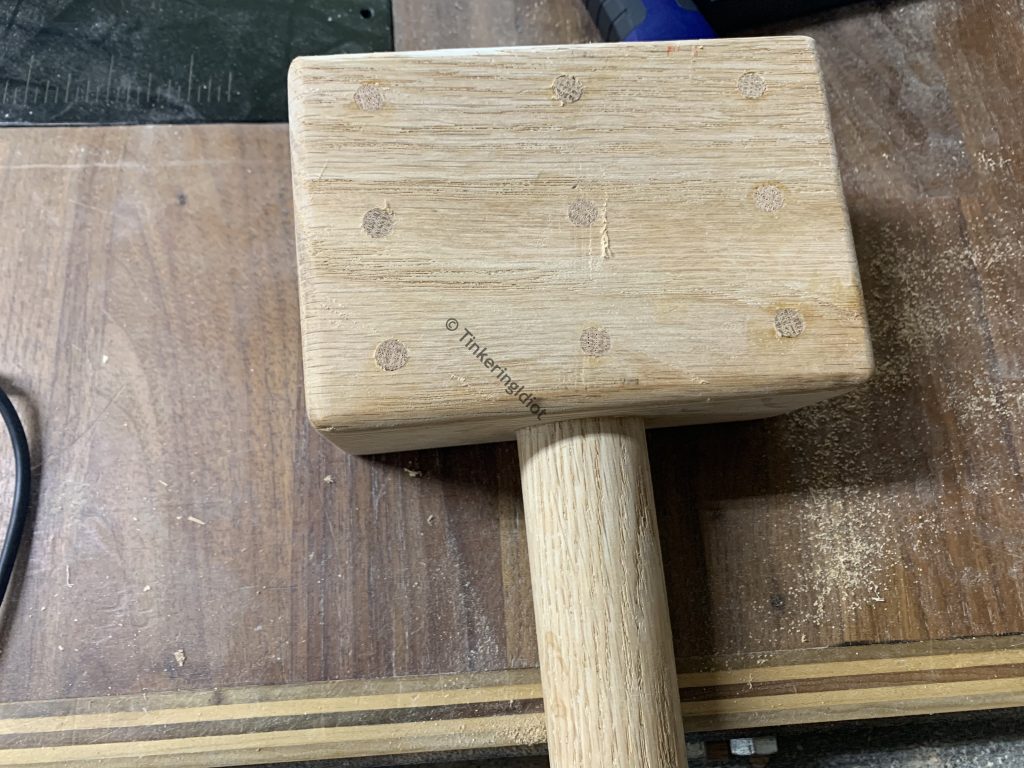
I trim the dowels flush with a pull saw.
At this point, I’ve run out of ways to put off finishing. A quick sand, and it’s on to the sticky, smelly, mistake-filled part.
This is a shop tool, so I’m just applying a basic polyurethane finish. No fancy stains or paints for a tool that only I (and the whole Internet) will ever see!
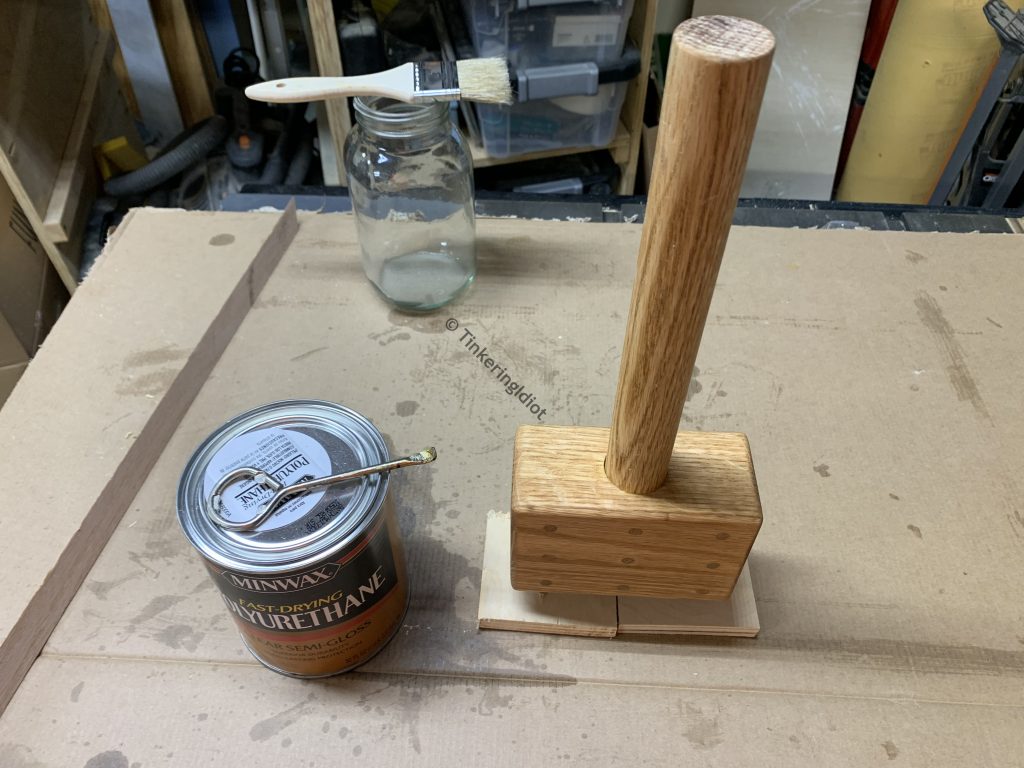
In total, I do 6 light coats of poly with some gentle 220 grit sanding between each coat. I don’t want it too thin, because this is Florida and the humidity is real, but I also don’t want it too thick, because this is a hittin’ stick and I don’t want the finish to crack.
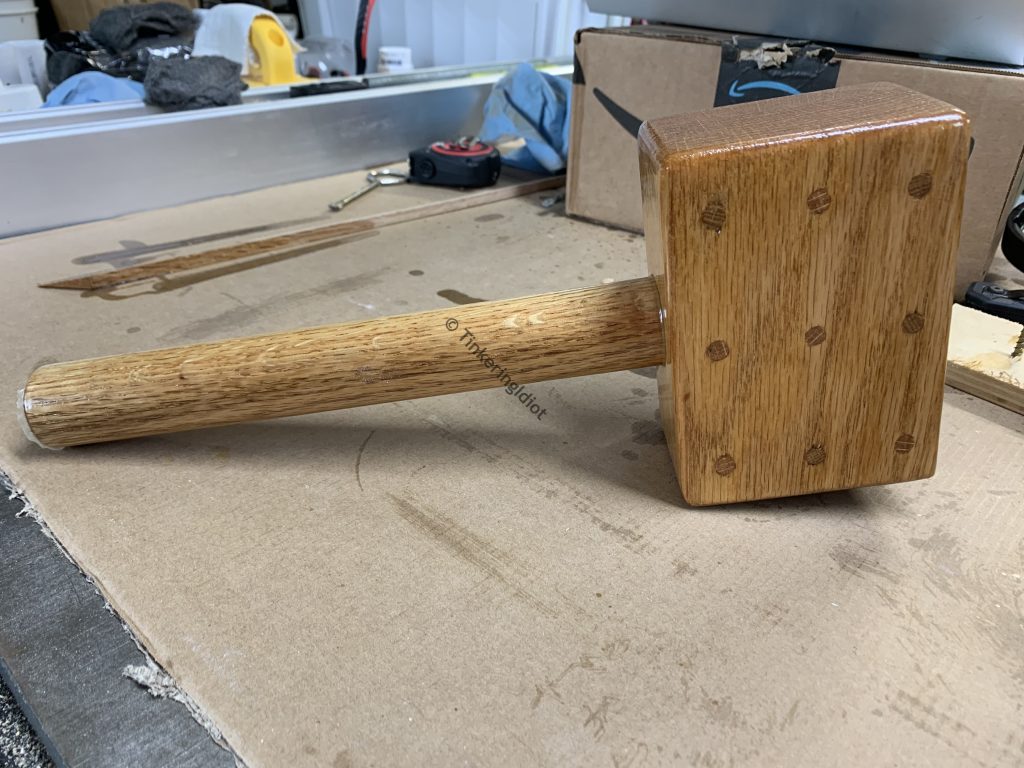
I think the final product is quite beautiful, and for such a simple project, I’m very proud of it.